Friday, January 20, 2012

The Evil Goodness of Pinterest...

I've always been interested in the website Pinterest....I've heard so many people talk about it and this and that, and that it was an invite only site or something, so I never really checked it out.  Then my friend Deanna invited me....(the first step to recovery is admitting you have a problem)....I'M FREAKING ADDICTED!!!!  :-p  This site has so many awesome ideas, from easy couple hour projects, to crazy intense quilt designs I'll never have the patience to do, to travel, to house of your dreams, to anything you can imagine.  I'm mostly on there for food and craft project ideas.  Occassinally I'll come across some other stuff I put up, but seriously...FOOD AND CRAFTS!! :-D

Here is one that is REALLY easy.  Anyone can do it.  Just make sure you do it outside so you don't get high off the fumes...It's frosting glass items you already have.  I don't know about you, but I have so many vases around my house that no longer hold flowers, that need something else to be done with them!  So last week Deanna and I got together and frosted some of our stuff.  You can find this in the spray paint aisle at Lowe's.  We used rubber bands and painters tape to create the designs, and put some paper towels inside with painters tape to keep the inside from being frosted too. Before and after!


I would also suggest a top coat, maybe matte finish??  We didn't use a top coat and unfortunately some of our frost is coming off, and doing a top coat after you remove the tape or rubber bands just ruins the effect.  We haven't perfected a finish yet to keep it from scratching, so if you try this and are successful, let me know what you did! :-)

Pinterest seriously has me wanting to make more and more stuff (bad idea, I already have so much stuff to make! lol).  This week I wanted another quick project that I could make in a day, so I decided to make custom dry-erase boards.  One for a weekly menu, and one for other notes.  We already had this in my house, but one was a huge chalkboard that I thought took up too much room and a whiteboard/pegboard combo in the kitchen.  I wanted something a little more classy, and prettier.  So I made these.  Simple enough: get a couple picture frames with glass, some scrapbooking paper and stickers, tape, ruler and scissors and you got yourself a couple dry-erase boards!  You can pick whatever size frames you want, whatever colors you want, etc.  Someone had said they didn't think dry-erase markers showed up very well on theirs so they use the Vis-A-Vis wet-erase markers.  You can use whichever.  Just make sure the paper you use is light enough so that at least a black marker will show up! :-)


These pics aren't the greatest....I took them early evening and due to the front being glass, having the overhead light on, or using the flash on my phone just created a glare so you can't see the color scheme very well.  Trust me, they're a combination of tans and browns with a light blue.  I just love these!  They came out so well, and are very useful and tasteful instead of big and bulky.  I used an 18.5" x 8.5" for each.  Now I just have to buy one more frame to replace with saved wine corks to make a new chic pegboad! :-)

More Baby Stuff...yay!

As I've said before, it seems like everyone I know is pregnant, or just had a baby, which is awesome.  Baby stuff is so cute to make, and is fairly quick to make which satisfies that need for semi-instant gratification of a project!  Recently my friend Abby had her first child, Peter, and he is really cute!  (Sorry, don't have a picture)  Anyway, I met her when we both worked at the bank in KS, she moved on to another job and eventually another state (CO), and we've managed to keep in touch over the past few years.  So when I saw she was expecting, I knew I had to make her something!  What I originally was going to make, wasn't working the way I wanted it to, so I yanked it all out and started on what is below.  Thankfully she had posted a picture on FB of the nursery theme they had come up with, so I could sort of match colors.  Since she lives in CO, I knew winters would be cold, so I made this adorable baby afghan to match her colors and to keep little Pete warm!  Here are a couple pics:


I wanted to make something else too, and after perusing the web for a while, I came across a free crochet pattern to make a small whale.  This was perfect since their theme is baby arctic animals!  The name of the pattern is Frank the Whale, I don't remember where I got it from....probably from someone else's blog. :-p  One thing I changed from the pattern is I made it into a rattle.  How do you do this?  Simple!  Just add in a cat toy jingle ball (not used obviously!) when you put the stuffing in!  Here is Frank the Whale!


And of course the two projects together.  Frank the Whale was made from leftover yarn from the blanket, so he matches.  :-)


That's my last baby project for a while....I'm currently working on another, but it's a much bigger project and will take a lot longer to make.  But no worries!  Other stuff will continue to be posted! :-)

Happy Creating!

Hoppin' John!

For as long as I can remember, my mom has always made Hoppin' John on New Years Day.  The story goes that even if you only have one bite on New Years Day, you will have good luck all year.  Well, as a kid, I always thought it was too spicy, so I just had that one bite, but now I love this stuff and really don't know why we don't make it more often as just a meal!  And the best part is you can make it as spicy (or not spicy) as you want!  Here is what you will need:

Ingredients:
·         1 cup dried black eyed peas
·         1 pkg bacon
·         1 medium onion, chopped
·         ½ cup celery, chopped
·         ½ green bell pepper, chopped
·         1 clove garlic, minced
·         2 cups water
·         1 tsp salt
·         1 bay leaf
·         Generous dash of cayenne and black pepper
·         3 cups cooked rice (about 1 ½ - 2 bags Minute Rice)
Directions:
1.       Soak black eyed peas in cold water overnight.  (If you forget, you can just boil them same day until they are rehydrated.)
2.      Cut up bacon into bite sized pieces.  In a large pot over medium-high heat, brown bacon, onion, celery, green pepper, and garlic together.  (See picture below)


3.      Drain black eyed peas and add to the pot.


4.      Add 2 cups of water and all seasonings (salt, bay leaf, cayenne and black pepper).  Cover and simmer 40-50 minutes or until black eyed peas are tender.


5.      Remove bay leaf and stir in cooked rice, cooking another 5-10 minutes.

So I forgot to take this last picture before I started chowing down, so it's only half a bowl. :-p  Yum Yum!!

Sunday, January 1, 2012

Home is where the Army sends us!

You've seen the signs before....Home is where the *insert branch of service here* sends us.  Well, we didn't want a generic one, we wanted to make our own to put up different pictures of the different places we've lived and so forth.  And while our sign isn't as "neat and perfect" as the ones you can buy online, or at a store, we like it because we made it and each place means something different to us.  We got all our supplies from Hobby Lobby (again, my favorite store ever), except for some spray paint from Lowe's.  Here is what we have so far....the one for our next duty station will be made after we get there and get to experience the area and what it has to offer (besides lots of snow!!).  P.S. You can't tell from this picture, but the dates for Fort Riley are painted in purple....a symbol of all the K-State friends we made while there! ;-)


And then my sister in law Lydia made us some really awesome location signs for Christmas!  They go perfectly with our sign, and now surround it on our wall.  They will probably all stay together as we move on, and she will have to continue making them as the years pass so they stay the same design.  And check out her stuff too on her blog at: http://lideyuhisdazedandamuzed.blogspot.com/

Here's the finished product!


Crock Pot Moroccan Chicken Stew

A while ago I started following a page on Facebook called Skinny Crock Pot (now Skinny Ms Slow Cooker due to trademark issues with the name), and I came across this recipe and thought it would be interesting to try.  Moroccan food has quick a unique flavor with the spice combinations, and not everyone will like it.  For me, I have to be in the mood for something like that, and this past week I was.  Here are a couple pictures and the recipe (the rolls aren't part of the recipe, just leftover from Christmas dinner).  It does make a lot, and did not fit in my 3 quart crock pot (had to use my 6 1/2 quart one), so if you have a small crock pot, be sure to cut this in half.  If you have a big enough one, it will definitely make enough to freeze for later!  Enjoy!


Ingredients:
·         1 ½ pound chicken breast, cut into cubes
·         3 carrots, peeled and cut into chunks
·         1 onion, diced
·         4 cloves of garlic, minced
·         1 large sweet potato, peeled and cut into chunks
·         1 can chickpeas, rinsed and drained
·         1 ½ Tbsp tomato paste
·         2 ½ tsp cinnamon
·         2 ½ tsp ground cumin
·         ¾ tsp ground coriander
·         ¾ tsp cayenne pepper
·         1 ½ cup green beans, cut into 1 inch pieces
·         Chicken stock (about 3-4 cups)
Directions:
1.       Place all ingredients into a 3 ½ or 4 quart crock pot and add enough chicken stock to cover.
2.      Cover and cook on low 6-8 hours.
3.      Remove chicken and shred.  Return to crock pot and stir to combine.
4.      Serve over whole wheat couscous or brown rice if desired.

**May substitute pork for chicken**

Wednesday, December 28, 2011

Christmas 2011 Crafted Gifts!!

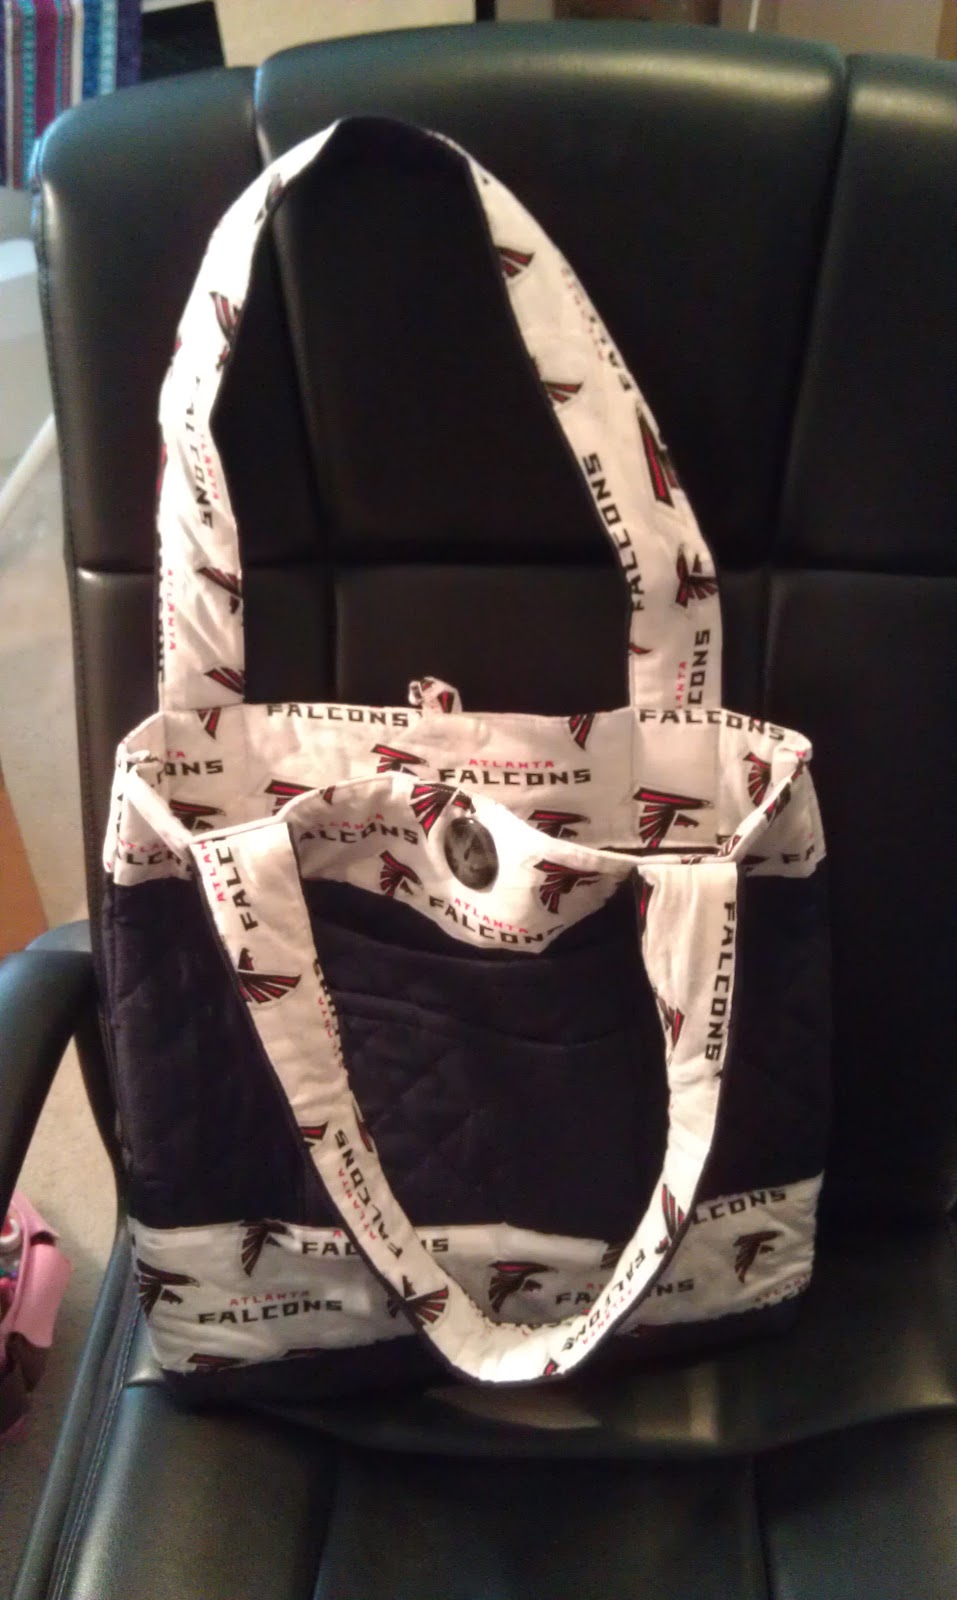
This year I had tons of ideas to hand make gifts for people, all of which included sewing.  Now I haven't been sewing that long, but I seem to be getting better with each project.  The first thing I completed was for my sister in law, Lydia, who loves the Atlanta Falcons.  Last year at their grandparents', her grandmother had made me a tote bag that Lydia also really liked, and I asked for the pattern to try to make it one day.  So when Lydia said she'd like something Falcons related, I knew instantly that I'd make her this bag for Christmas.  When my sister was here for Thanksgiving, she saw it too and thought it was really awesome, and now wants one for the New York Jets. lol.  Maybe for her birthday....this year she got something else (further down on this post).  And maybe one day I'll make myself a Hokie one!  Here is the bag, took me about 2 days to make it.


So the next project I worked on was for my mother in law Susan for Christmas.  Again, I got this idea from her parents' house at Christmas last year.  They had this really cute placemat/table runner set that was snowmen and was quilted.  So my idea was to make her a table set, but I didn't exactly know what fabric I wanted until I went to the quilt store.  I saw this striped snowflake pattern and loved it!  (I love snowflakes anyway, and this was really cute.)  Then I found a complimentary fabric to use with it, along with a stencil to do the quilting.  Second project ever to actually quilt, and it turned our really well I think!  Final product was 1 table runner (more like a table center piece) and 6 placemats.  Only 4 are in the picture because there wasn't enough room on my craft table lol.  Here are a bunch of pictures:


And last but not least is a New York Jets santa for my sister Ashley.  I searched forever to try to find a decent Jets fabric to use, but all of the team logo fabrics were way to "cheeky" to use for a nice old-time Santa Claus, so I went with using the Jets' colors instead, and then made a Jets football for him to hold.  For the football, we found an ornament at Hobby Lobby (my favorite store ever!!) and then spray painted it white, and painted "Jets" on it with some green accents.  Maybe once I get to NY next summer, I'll find something else to accessorize him with, but we'll see.  Here is the Santa, made in a day.  And I finally took the time this go-around to make templates so future Santa's won't take nearly as long, or use as much material!  :-)


That concludes my Christmas gift post.  If you see anything you like, let me know!  :-)

Another Baby Project Completed!

It seems like all of our friends are expecting these days, which is great!  I love making baby stuff, and especially had a great time making these items for our friends Adam and Nicole.  They are expecting their first child about mid January. 

The first is a baby afghan, in a square for swaddling should they choose.  I was sneeky when I asked her what colors she was thinking for the nursery.  We had gone to a quilt shop to get fabric for my mother-in-law's Xmas gift (next post), and I just brought it up so she could show me about the shades she was thinking in the fabric. :-)  Then I got some yarn and started right away!   Here is the afghan, measuring about 30" square, using the Caron Simply Soft brand.  And after you wash it, it is soooo soft!

Entire blanket

Close up of the mini squares

Close up of the edging
So with her green theme, she wanted to add some brown in there as well, but the brown I found just wasn't the right shade, hence the shades of green.  But when I think of that color combination, I think trees, and then the thought to make a monkey popped into my head!  So I searched online, and found a free crochet pattern to make a sock monkey.  Rather than making him brown, I used more green to match the blanket and it was super cute in a different color.  Here he is!!  I think he's just adorable. :-)


And I hardly ever get to take pictures of the couples with the gifts I make for them, but I was fortunate enough to give this to them in person, and snag 'em for a picture!  :-)


Breakfast Casserole! Mmmm....

I love breakfast casseroles, but I really dislike the ones that have that sponge-like texture to them.  It's a weird consistency and kind of gross in my opinion.  Then one day for a food day when I worked at the bank in KS, my friend Katy brought in this one.  I had to have her recipe!  It's so tasty, no sponges, and even has a slight kick to it!  Yummy Yummy!  So here is the recipe, along with a picture.  You can prepare it the night before as well (except for the eggs and cream part, do that in the morning).  Just make, let all ingredients cool before combining, stick in the fridge and complete the eggs and cream part in the morning, bake as directed! (I had to do this for Thanksgiving since I didn't want to get up at 5 AM just to make breakfast lol) Enjoy! :-)


Ingredients:
·         1 bag frozen hashbrowns
·         2 cups shredded pepperjack cheese
·         2 cups shredded Colby/Monterey jack cheese
·         1 pint whipping cream
·         6 eggs
·         2/3 cup butter, melted
·         Breakfast meat of choice, I use about 1 ½ packages of Jimmy Dean’s Sage sausage in the roll
Directions:
1.       Put hashbrowns in a 13x9 pan and pour melted butter on top.  Bake at 350 degrees for 30 minutes.
2.      Brown/cook the breakfast meat.
3.      Layer cheese over hashbrowns then add breakfast meat.
4.      Mix eggs and cream and pour on top of casserole.
5.      Bake at 350 degrees for 30-45 minutes, or until eggs are set.

Thanksgiving (Finally!)

Okay so I know it's been a while since Thanksgiving rolled around, but I've been busy! 

My sister Ashley flew in from VA all the way out here to AZ to come visit, and my grandparents came into town as well (they're already in AZ, just a little drive to get here).  They visited for a few days before and after Thanksgiving, so we got to spend lots of family time together.  We went wine tasting once before, and once after Thanksgiving, which was fun (there isn't a lot to do around here anyway!) and we found a great white wine from Kief-Joshua Vineyards for Thanksgiving dinner....while Ashley oggled the one owner behind the counter, who reminded me of one of my brother's friends from HS.  Anyway, sorry Ash, I think he's got a girlfriend. :-p  Here's a picture of an American flag blowing in the wind right outside of Sonoita Vineyards and their picturesque view:


So Thanksgiving Day came around, and with 5 adults to feed, I had to come up with something that would be somewhat easy to make in the morning.  I decided on a breakfast casserole recipe from my friend Katy in KS and always popular cinnamon rolls!  (The breakfast casserole recipe will be in a separate post for easy searching later.)  Here's a picture of breakfast!


Now time to stuff the turkey!!  This was Chris's job, since we got a ginormous 26 pound bird this year!  We had to put the roasting pan and rack in the sink in order to get it all in there without having a turkey wind up on the kitchen floor!  Check out the wingspan on this thing!


And now for the finished product after many hours of cooking, along with our dining room table set up and all the deliciousness of the serving table:


And what Thanksgiving dinner wouldn't be complete without some dessert??  I had to yoink these pictures from my sister because apparently we didn't take any of the desserts.  They were all so delicious!! :-)


And thus concluded our Thanksgiving Day...and I will leave you with a picture our puppy (small horse), Lane, snuggling on Ashley's lap (who you can't see lol).  

Wednesday, November 23, 2011

Marbled Pumpkin Cheesecake

Thanksgiving is tomorrow, and pumpkin pie is a standard dessert for the American population for this holiday.  I am not a fan of pumpkin pie....the flavors are nice, but the consistency is gross to me.  I believe I made this for the first time two years ago for a food day at the bank in KS....they were my guinea pigs since I had never made it before.  It had rave reviews and lots of people asked for the recipe.  I made another one about a week later to share with my family for the holiday and now I make it every year.  My hubby likes the pie, so if he really wants it, he can make it, but I will always make the cheesecake.  Here is the picture, and the recipe.  Enjoy and Happy Thanksgiving! :-)

Mmmm!!  One of my favorite cheesecakes. :-)
Ingredients:
·         1 ½ cups crushed gingersnap cookies
·         1/3 cup butter, melted
·         2 (8 oz) pkgs cream cheese, softened
·         ¾ cup white sugar, divided
·         1 tsp vanilla extract
·         3 eggs
·         1 cup canned pumpkin
·         ¾ tsp ground cinnamon
·         ¼ tsp ground nutmeg
Directions:
1.       Preheat oven to 350 degrees F.  In a medium bowl, mix together the crushed gingersnap cookies and butter.  Press into the bottom, and about 1 inch up the sides, of a 9 inch springform pan.  Bake crust 10 minutes in the preheated oven.  Set aside to cool.
2.      In a medium bowl, mix together the cream cheese, ½ cup sugar, and vanilla extract just until smooth.  Mix in eggs one at a time, blending well after each one.  Set aside ¾ cup of the mixture.  Blend ¼ cup sugar, pumpkin, cinnamon, and nutmeg into the remaining mixture.
3.      Spread the pumpkin flavored batter into the crust, and drop the plain batter by spoonfuls onto the top.  Swirl with a knife to create a marbled effect.
4.      Bake 55 minutes in the preheated oven, or until filling is set.  Run a knife around the edge of the pan.  Allow to cool before removing pan rim.  Allow cheesecake to cool completely before chilling at least 4 hours before serving.